
Master Bedroom Herringbone Accent Wall


On this DIY, we wanted a unique wall treatment for our bedroom in between the two windows we had. There are the steps we took to create this accent wall.
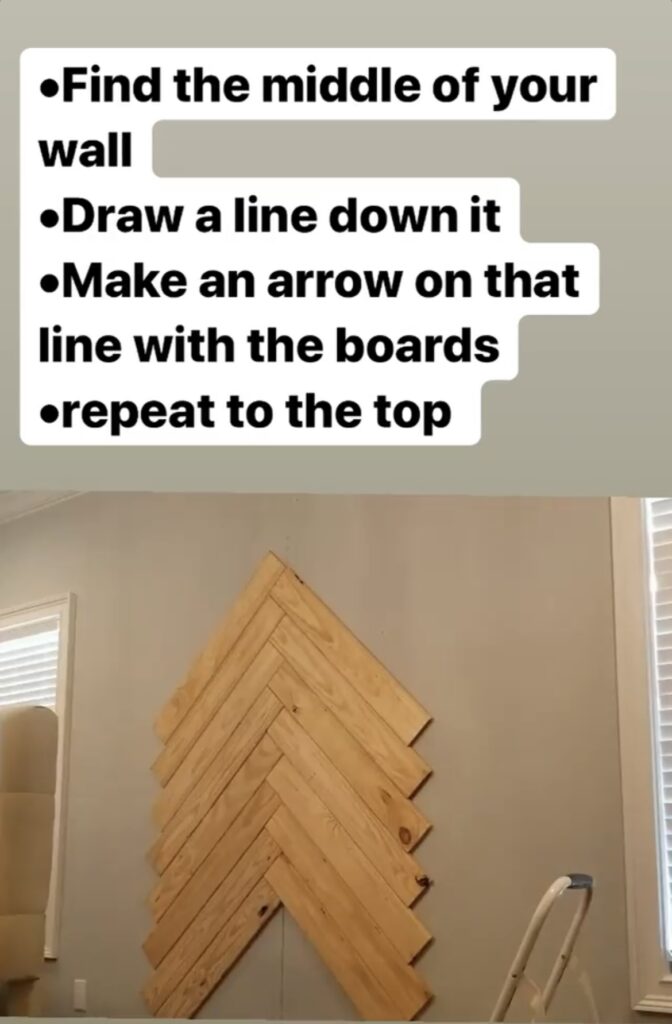
Find the middle of your wall and mark a line all the way down it.
Determine what size boards you want to use and cut to size.
We used 1×6” tongue and groove boards we had left over from our build. We cut those to 3” boards.
Ideally you may want to use boards that do not have the V-notch like the ones that we used so the boards would be flush together, but we liked the look of the gap for ours.
Take your first board and place at a 45 degree angle with one end resting on the baseboard. The other end should be aligned with the previously drawn center mark.
We did not take our baseboards off for this since our bed would always hide the boards. We have crown molding on our ceiling and didn’t take that off either.
Repeat stacking the boards on top of each other, making the arrow point on the line drawn.

Once those boards reach the top, start fitting in the other 3ft boards on each side. You may have to make cuts on each board depending on how much room you have left on each side. Continue adding wood to create the herringbone pattern until the whole space you want is covered.
We stained our accent wall Minwax Pickled Oak to give it a lighter look. You can also use diluted white wash to give the same look.
Supplies Needed:
1×6” tongue and groove boards
Nail gun 16 gauge 2 ½” nails
Adhesive construction glue
Miter Saw
Minwax pickled oak stain
Level
Tape measure
Framing square
